
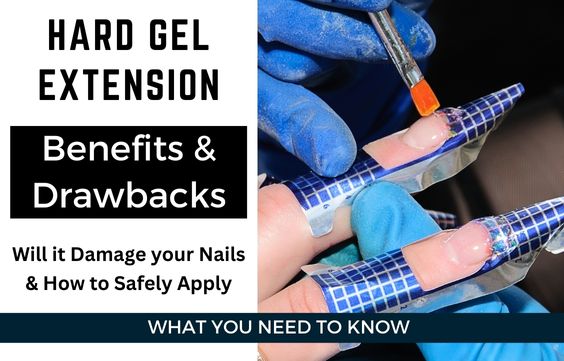
Hard Gel Extensions: How to Apply, Benefits & Risks
I have been using hard gel to make extensions for many years now and I can attest that they are one of the best ways to create long-lasting and durable manicures.
But they do have some issues that’s why in this article I am going to explore hard gel extensions to help you understand if it’s right for you. I am going to cover:
- What are hard gel extensions?
- How damaging are they to your nails?
- Benefits of using them
- How to apply
- Drawbacks of using hard gel
What are Hard Gel Extensions
Hard gel extension are manicures where your nails are extended by using hard gel which require a UV nail lamp to cure and harden.
Hard Gels are different from soft gels in that hard gels are non-porous which means that they cannot be removed using acetone instead they need to be filed off.
Related Articles:
Polygel vs Soft & Hard Gel – Differences & Which is Better
BIAB Extensions are they good: Pros, Cons & How to DIY
Are Hard Gel Extensions Damaging
This is the most common question I get, this is because people are worried since hard gel is so strong and tough that it might damage their nails.
But you don’t need to worry once Hard gel is applied and removed correctly it won’t damage or significantly affect your nails.
After using hard gel for many years both on myself and on my clients I have never had a case where a hard gel manicure caused any damage.
Like most types of manicure hard gel once done and removed correctly won’t affect your nails.
Now, I have seen individuals who either didn’t apply or remove the hard gel correctly have significant damage to their natural nails. This usually occurs due to over-filing, not using a good base coat, or using very strong acid primers.
Related Articles –
2 Ways to Remove Hard Gel at Home (With & Without Drill)
What are Soft Gel Nail Tips: How to Apply & Pros & Cons
Hard Gel vs Gel X- Differences & Which is Better
Benefits of Hard Gel Extensions
- Extremely durable – Hard gels are the strongest type of gel they are almost on par with acrylic nails. They won’t chip, break, lift, or peel easily
- Long-lasting – can potentially last for more than 4 weeks and even longer with a fill-in
- Stain Resistant – Hard gels are non-porous so they can’t get stained easily so your hair and fabric dyes and even curry won’t stain them.
- Easier to apply for beginners – This is because you can take your time to work with since hard gel won’t harden until cured, allowing you time to get them right before curing. Also, it is self-leveling meaning it naturally spreads out requiring less work.
Related Articles –
Benefits & Disadvantages of Gel Nails – Are They Worth it
5 Alternatives to Gel Nails: Safe, Healthy & Durable
How long do hard gel nail extensions last?
I have found that hard gel nail extensions once applied correctly can easily last 4-5 weeks. But after 3 weeks of wear, the gel extension will need a fill-in.
This is because your nails will grow out and will leave a gap at the back of your extensions which will need to be filled in.
Now the longevity of your hard gel will vary based on;
- The brand of the hard gel used – some brands are better than others, keep reading for my recommendations
- How well the natural nails were prepped
- How well the gel nails were applied and built out – having a good structure makes the extensions stronger.
You can click here to read my article 10 Tips to Make Gel Nails Last Longer.
Drawbacks of Hard Gel Extensions
- Difficult to remove – hard gel cannot be removed with acetone instead they need to be filed off, usually when an E-file which requires some skill and practice. Now you can use a manual hand file but this will take a very long time compared to using an E-file.
- Requires the use of a UV nail lamp – repeated exposure to strong UV light like those found in nail lamps has been linked to causing skin conditions. This why I recommend protecting your skin by wearing manicure gloves or applying sunscreen on your fingers.
- More costly than acrylic – Hard gel extension will cost more than acrylic extension. Gel extensions tend to cost 60% more than acrylic nails.
Related Articles:
6 Ways to Protect Hands from UV Lamps- Safer Gel Manicures
Gel Extensions vs Acrylic – Which is Better & Last Longer
What is the Cost of Hard Gel Extensions
Hard gel extension can cost anywhere between $45-100 or more. This really depends on your location and the amount of work that you want to be done on your nails if you want a lot of nail art and decor the price will be higher.
You can click here to learn more about what you can expect to pay for gel nails based on your location.
How long do hard gel extensions take?
Hard Gel Extension manicures can take roughly 60-90 minutes. This will vary based on the design that you want and how skilled your nail tech is.
A basic full set of hard gel extensions with polish takes me around 1 hour to do. You can click here to learn more about How long to expect different manicures to take.
How to Apply Hard Gel Extensions at Home
Thankfully you can DIY hard gel extensions at home. They are 2 ways to apply Hard Gel Extensions either:
- Using nails forms –
- Or Plastic nail tips
Both methods can be a bit tricky this is why I recommend practicing first on a dummy hand or on a fake nail before trying it on someone else or yourself.
Applying Hard Gel Extensions Using Forms
What you need:
- Hard Gel
- Gel Base Coat
- Gel Brush
- UV-Led Nail Lamp
- Nail forms
- Nail File – a 180 grit works best
- Cuticle Pusher
- Nail Primer & Dehydrator – prevents lifting
Method:
- Firstly, use a cuticle pusher and gently push back your cuticles.
- Secondly, use a nail file and gently file your nails
- Next, clean your nails with a cotton pad soaked in rubbing alcohol.
- Then apply a coat of the dehydrator and the nail primer.
- Now you can apply a gel base coat and then cure it for 30 seconds.
- Fit the nail form onto your nails and once the form is on the nails you can start applying the hard gel.
- Apply a small bead of gel onto the nail form at the tip of the nails and make a thin extension like the same thickness as your nails and then cure.
- Now you can apply a larger bead of gel onto the nails and slowly use your brush to spread the gel down to cover the entire nail & extension.
- Once you are satisfied with the shape and thickness cure under the nail lamp and then wipe away the sticky layer with cotton pads soaked in rubbing alcohol.
- Next file and buff your nails until you are satisfied
- Finally, you can apply other nail products onto them like polish or gel polish.
How long your hard gel will take to cure will depend on the brand that you use, so ensure you read the instructions to know the curing time.
Video Showing How to Make Extensions Using Hard Gel
How to Make Extensions Using Hard Gels & Tips
You can use plastic tips that are glued onto your nails using nail glue as the base for hard gel instead of nail forms.
The main issue with using plastic tips is that the extensions, from my experience, tend not to be so durable and are prone to lifting faster when compared to extensions made using forms.
You can click here to read my article on Nail Forms Vs Tips – Which One is Really Better & Stronger
They are a few things you need to know when working with nail tips I have a great video below to show you how it’s done.
Video of How to Apply Hard Gel Extensions Using Tips
Recommended Hard Gels
The hard gel than I use and love is by IBD, it has a nice formula that is not too thick or too thin but is a nice balance allowing for easy application.
You can click here to see price for a jar of IBD Hard Gel on Amazon.