
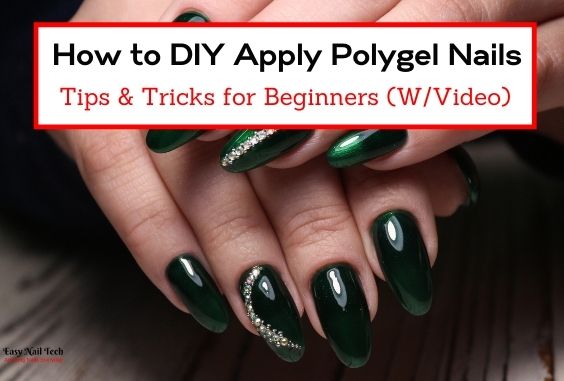
4 Ways How to Apply Polygel Nails – Beginner Tips (W/Video)
Using Polygel is one of the easiest ways to create amazing and durable manicures. And because of this, it is one of the best ways to do your manicures at home even if you don’t have much previous nail experience.
So in this article, I am gonna guide you through step by step the different ways you can apply Polygel Nails at home.
Now there are four different ways you can apply Polygel on your nails, you can use:
- Plastic Dual Forms – this is the quickest & easiest way for beginners to use Polygel
- Paper Nail Forms – requires more practice and skill but allows you to make your nails look exactly how you want.
- Nail Tips
- Applied directly to your natural nails – like nail polish
1- How to Use Dual Forms to Apply Polygel
In my opinion, Dual Forms are the easiest way to apply Polygel, especially for beginners. This is because you won’t need to sculpt out the nails which takes time and practice to master.
Dual Forms also require less buffing at the end – this is because most of the time you get a nice smooth texture without having to buff.
- The first thing that you need to do is prep your nails, start by pushing back & aligning your cuticles and then filing your nails with a medium grit nail file
- Once your nails have been filed, clean them by wiping them down with pure alcohol or acetone and then apply a dehydrator and a nail primer.
- Next, apply a gel base coat and cure it for 30 seconds.
- Once prepped you can proceed to apply your Polygel, you can start by sorting out the dual forms to match the size of your nails.
- I recommend using dual forms that are slightly wider than your nails – this allows the side of dual forms to cover down the sides of your nails completely.
- Now add a bead of polygel into the middle of the dual forms and then wet your brush with slip solution
- And then use the brush to spread out the Polygel in the dual form
- Next, press the dual form onto your nails and then cure it for 60 seconds under a UV Led Lamp.
- Once cured take off the dual forms and wipe the nails down with rubbing alcohol to remove the sticky layer.
- Finally, file and shape the edges to your liking and then apply a gel top coat and cure for 60 seconds.
You can check out the video below to see exactly how it’s done.
Video of How to Apply Polygel With Dual Forms
Tips When Working With Dual Forms
- If the dual forms are way too big for your nails you can file them down to get a better fit.
- When spreading the Polygel in the dual forms try to make it slightly thicker in the middle and thinner at the edges this helps prevent the polygel from coming out too much when you put it on.
- Use the brush to neaten up the underside of the dual form before curing to give it an even look.
- I also recommend curing underneath the dual forms to ensure the entire nail is cured completely.
Related Articles:
Polygel vs Soft & Hard Gel – Differences & Which is Better
Polygel Base Coat- Is it Needed, Type to Use & Best Brands
7 Tips to Make Polygel Nails Last Longer Without Lifting
Recommended Polygel Kit For Beginners
I highly recommend the Morovan Polygel Kit, it comes with everything that you will need to start doing Polygel including dual forms and paper forms.
You can click here to see the current price for the Complete Morovan Polygel Kit on Amazon.
Or you can click here to read my total review on it along with my other recommendations.
Also, if your polygel nails are prone to breaking then check out my article 6 Reasons Why Polygel Breaks or Lifts- How to Fix & Avoid
2- How to Apply Polygel with Paper Nail Forms
Paper nail forms take more time and they require more skill when compared to dual forms. But they allow flexibility allowing you to craft your nails to look exactly how you want them to be.
- Firstly, you need to prep your nails by pushing back your cuticles and filing your nails with a medium grit nail file.
- Then you need to clean your nails by wiping them with either rubbing alcohol or acetone.
- Next, apply a nail dehydrator, a nail primer, and then a gel base coat and let it cure for 60 seconds.
- Now you can put on the nail form and apply and sculpt out the Polygel to your liking using your Polygel Brush, I have a video down below to show you how to do this.
- Next, cure your Polygel for 60 seconds and then file your nails to make your nails nice and smooth.
- Finally, apply a gel top coat or your nail polish.
You can check out the video below to see exactly how to sculpt out the Polygel using paper forms.
Video of How to Apply Polygel Using Paper Forms
3- How to Apply Polygel With Nail Tips
- The first thing that you need to do is prep your nails by pushing back your cuticles and filing your nails with a medium grit nail file.
- Secondly, clean your nails by wiping them with rubbing alcohol or acetone.
- Next, apply a coat of your dehydrator and nail primer to your natural nails.
- And then you can glue on your nail tips.
- Next, apply your base coat on the entire nail, and then apply your Polygel
- Now, use your brush dipped in slip solution to sculpt out the nails to your liking.
- Once sculpted cure the Polygel for 60 seconds, then wipe them with rubbing alcohol to remove the sticky layer.
- Finally, file your nails to smoothen them out and then apply your top coat or nail polish.
You can check out the video for more details on how to apply your Polygel with Nail Tips.
Video of How to Apply Polygel With Tips
4- How to Apply Polygel Nails to Natural Nails
Polygel can be applied directly to your natural nails similar to how you would use a gel nail polish.
Now the advantage of using Polygel rather than a gel polish is that it will be more durable.
- The first thing that you need to do is prep your nails
- You can do so by pushing back your cuticles and filing your nails with a medium grit nail file
- Secondly, clean your nails by wiping them with rubbing alcohol.
- And then apply a coat of dehydrator, nail primer and then a gel base coat which needs to be cured for 60 seconds.
- Next, apply a bead of polygel onto your nails
- And then use your Polygel Brush dipped with slip solution and spread it out evenly over your nails
- Once your nails look good you can cure it for 60 seconds and then wipe off the sticky layer with rubbing alcohol
- Finally, buff your nails to smooth them out and then apply a gel top coat and cure it for 60 seconds.
You can check out the video below for step by step guide on how to spread out the Polygel on your natural nails.
Video of How to Apply Polygel To Natural Nails
Recommended Tools
I highly recommend Morovan Polygel Kit, it includes everything you need to do Polygel Nails making it perfect for a beginner.
You can click here to see the current price for one on Amazon.
Other Polygel-Related Articles
Best Brands of Polygel Nail Kits – That are Easy To Use
Can You Paint on Polygel Nails – Easy Polygel Tips & Tricks
Polygel Slip Solution What is it & What Can You Use Instead
How Long Does Polygel Last & Tips to Make them Last Longer
Quick & Easy Ways How to Remove Polygel Nails at Home
4 Ways How to Apply Polygel Nails – Beginners Tips
Polygel vs Acrylic: What are the Differences & Which is Better
Does Polygel Damage Nails- What are the Pros & Cons
3 Easy Ways to Fill Polygel Nails at Home (w/Video)