
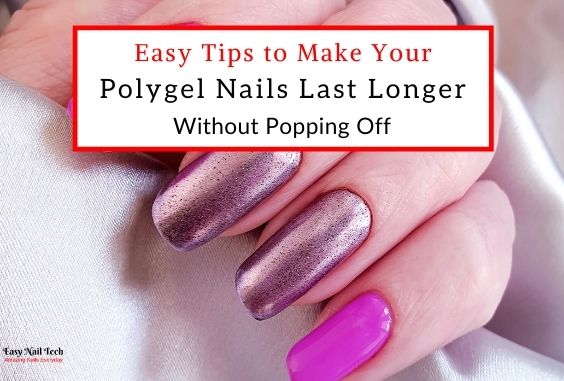
How Long Does Polygel Last & Tips to Make Them Go Longer
Polygel Nails are amazing not only do they look great but they are easier to apply when compared to acrylic nails.
But the main drawback with Polygel nails is that they are not as durable as acrylic nails. But they are some tips and tricks that you do to make them last longer.
So in this article, I am gonna share with you 7 easy tips to make your Polygel Nails extremely durable, long-lasting and prevent them from coming off prematurely.
How Long Does Polygel Nails Last For
If applied correctly Polygel Nails can last for 3-4 weeks. But Polygel’s lifespan will vary greatly with each individual.
You see the more activity that you do; such as gardening, cleaning, and cooking will expose your nails to harsh chemicals and other environmental factors which would decrease the lifespan of your Polygel Nails.
This is true for all types of manicures from acrylic nails to dip powder. Citation.
Related Article – 3 Easy Ways to Fill Polygel Nails at Home (w/Video)
Tips to Make Your Polygel Nails Last Longer Without Lifting
1- Correctly Prep & Clean Your Nails
The most important thing you can do to make your Polygel Nails last longer is to correctly prepare and clean your nails before applying any product.
To prep your nails you need to:
1- Firstly, remove any existing products on your nails such as nail polishes or acrylics.
2- Secondly push back and align your cuticles – to do so you need to take a cuticle pusher and push your cuticles towards the back of your nails.
If you apply your Polygel Nails without tending to cuticles, some of the Polygel would be applied to the cuticle area instead of directly onto your nails which can lead to lifting.
3- Thirdly File Your Nails – Use a medium grit nail file to file your nails. This removes the sheen from your nails making it rougher which would allow the Polygel to adhere better. Filing the nails also helps to remove any cuticle skin on your nails that would cause lifting.
You can use a 180 grit nail file, you can click here to see the price for one on Amazon.
4- Wipe your nails with either acetone or rubbing alcohol – Once you have filed your nails, you need to clean them with either acetone or rubbing alcohol.
This helps to remove any oil and dirt that might be on your nails which can prevent the Polygel from adhering.
You can click here to read my complete in-depth article on the 4 ways How to Apply Polygel Nails at Home
Related Article – Polygel Overlay on Short Nails- How to Apply, Pros & Cons
Video to Show How to Prep Your Nails For Polygel
2- Use a Nail Primer and a Dehydrator
Nail Primers and Dehydrators are essential for long-lasting manicures – especially if your manicures are prone to lifting.
Dehydrators are used to remove any moisture and oil from the nail plate. Both oil and moisture can hinder the Polygel from bonding to your nails.
Nail Primers make small microscopic scratches on your nails to roughen them up. This allows the Polygel to grip onto your nail plates allowing them to adhere better and last much longer.
How to Apply Nail Primer & Dehydrator.
Once your nails have been prepped apply a coat of the dehydrator on each of your nails and then apply a coat of the nail primer.
Morovan has a great nail primer and dehydrator combo set that works great with Polygel, you can click here to see the current price for it on Amazon.
Related Articles:
What are Nail Primers & Dehydrators- How & When to Apply
5 Best Nail Primers, Prep & Dehydrators to Prevent Lifting
3- Use a Gel Base and Top Coat
A good gel base and top coat can make your Polygel Nails more durable and look more glossy.
Gel Base Coat – bonds firmly with your nail plate whilst at the same time creating a nice sticky layer for your Polygel to adhere to. Click here to learn more about Gel Base Coats for Polygel Nails
Gel Top Coat – creates a hard and durable glossy layer over your Polygel Nails preventing them from:
- Getting scratched easily
- Creates a buffer layer to prevent the Polygel from being exposed to harsh chemicals which can quickly break down the Polygel.
I recommend Gelish Base and Top Coat, they are a bit expensive but they are by far the best Gel Base & Top Coat. You can click here to see the current price for a combo set on Amazon.
If your Polygel Nails are prone to breaking or lifting you definitely need to read my article 6 Reasons Why Polygel Breaks or Lifts- How to Fix & Avoid
4- Invest in a Good Brand of Polygel
They are a wide variety of different brands of Polygel available. And a lot of these brands are super cheap but low quality and wouldn’t be very durable and long-lasting.
So I recommend sticking with a high-quality brand that is more likely to be durable and look really good.
I have an entire article where I will guide you on how to select the best Polygel Kit that would fit your needs, you can click here to read it.
But if you are in a hurry, Morovan has some high-quality Polygel on the market. That will last you for a long time without popping off.
You can click here to see the current price for a Morovan combo set on Amazon.
Related Articles –
Polygel vs Soft & Hard Gel – Differences & Which is Better
Does Polygel Damage Nails- What are the Pros & Cons
5- Avoid Exposing your Polygel Nails to Harsh Chemicals
My next tip to make your Polygel Nails last longer is to avoid exposing your nails to harsh conditions such as; heat from cooking, strong detergents from cleaning, and pesticides from gardening.
These conditions tend to wear away your Polygel nails and make them faded and more prone to lifting.
So I recommend wearing strong rubber gloves when cleaning, cooking, or gardening to protect your Polygel nails.
Related Articles:
Can You Paint on Polygel Nails – Easy Polygel Tips & Tricks
3 Quick & Easy Ways How to Remove Polygel Nails at Home
6- Ensure that your Polygel Nails are Cured Completely
Polygel that isn’t cured properly will be very weak, it will have a hard outer layer and a soft inside. This means that your Polygel will be very prone to breaking.
Now to ensure that your Polygel is cured completely you need to:
- Follow the instructions of the specific brand of Polygel that you are using. This means that if the instruction says cure for 60 seconds ensure that you cure it for 60 seconds.
- Cure underneath the Polygel – I recommend turning your hands over and curing under your Polygel Nail Extensions. This helps to ensure that your Polygel is completely cured.
- Use a good high-quality UV Led Lamp – I recommend using a 48-watt or higher lamp. The higher the wattage the more powerful the lamp will be.
You can click here to see the price for a great 48 watt UV Led Lamp on Amazon.
Related Article – Top Polygel Questions Answered & Mistakes to Avoid
7- Use Nail Forms Instead of Tips
Polygel nails that are applied using nail forms instead of using nail tips tend to be more durable.
Nail forms allow the polygel to bond completely to the entire nail plate giving your polygel nails a stronger adhesion to your natural nails allowing them to last longer.
Whilst nail tips rely on nail glue which creates a weaker bond to your nail plate and thus makes your polygel nails more prone to lifting.
There are different ways to apply polygel nails you can click here to read more about the different ways to apply Polygel.
Other Polygel-Related Articles
Best Brands of Polygel Nail Kits – That are Easy To Use
Can You Paint on Polygel Nails – Easy Polygel Tips & Tricks
Polygel Slip Solution What is it & What Can You Use Instead
How Long Does Polygel Last & Tips to Make them Last Longer
Quick & Easy Ways How to Remove Polygel Nails at Home
4 Ways How to Apply Polygel Nails – Beginners Tips
Polygel vs Acrylic: What are the Differences & Which is Better