
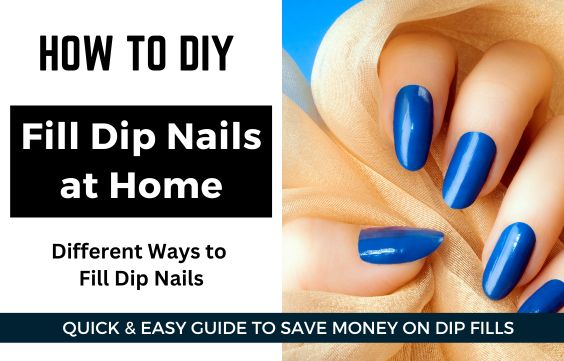
How to Fill Dip Nails at Home- Easy DIY Methods (W/Video)
Dip Nails are extremely long-lasting and durable and can easily last more than 4 weeks. This means that your nails will grow out, whilst having on a dip manicure, leaving a clear empty gap at your cuticle area.
Thankfully, you don’t always need to remove your entire dip manicure and start all over again. Instead, you can fill the growth gap on your Dip Nails right at home or at the salon.
There are different ways you can do to do a fill too, you are not just limited to using dip powder. So in this article, we will guide you on the different methods to fill dip nails.
When Do You Fill & When Do You Remove Dip Nails
One of the most asked questions I get is when do you fill a dip powder manicure and when should you remove and then reapply a new dip manicure?
I usually fill my dip nails when the manicure has grown out but still looks like it’s in a good condition meaning no peeling, chipping, or lifting.
But I usually recommend that if your dip nails are lifting, chipping, and peeling you should remove the entire thing and then reapply a fresh manicure.
Related Articles:
2 Ways to Easily Remove Dip Powder Nails Without Acetone
How Much Dip Nails Costs & Price to Fill & Remove Them
How to Fill Dip Nails
What do you need:
- A nail file and cuticle pusher
- A colored Dip Powder (but if you don’t want to use a colored dip powder you can also use nail polish instead)
- Dip Activator (Also called Seal Protect for Kiara Sky users)
- The Dip Base
- A Dehydrator and A Top Coat
Video of How to Fill Dip Powder
Step 1 – Prep Cuticles & File the Dip Nails
The first thing you will need to do is use a cuticle pusher to push back your cuticles to make space for the application of the dip powder. Next, you will need to file the dips nails. I recommend a coarse-grit E-file or a 100-grit hand file.
You will need to file away the top layer of the dip nails. If you are planning to reapply a darker or the same color of dip powder you just need to file off some of it just ensure the top coat is removed. But if you are planning to use a lighter color ensure you remove all of the previous colored powder.
Once the previous colored dip powder is removed use the file to smooth down the back of the manicure near to the cuticle area. This allows the manicure to have a seamless transition rather than having the back have more bulk.
Related Articles:
7 Tips to Always Make Dip Powder Nails Smooth & Shiny
Dip Powder on Short Natural Nails- Benefits & How to Apply
Is Dip Powder Good for Nails- Side Effects, Pros & Cons
2- Clean the Nails & then Apply a Dehydrator
After filing wipe your nails down with rubbing alcohol to remove any dust. Next, apply a coat of dehydrator at the back on the exposed part of your natural nails.
You don’t need to apply the dehydrator on the entire manicure just on the nail that is exposed. Dehydrator only works on the natural nails and it is meant to prevent lifting.
Related Articles:
3 Easy Ways to Do Dip Powder Nail Extensions
How Long Do Dip Nails Last & Tips to Make them Last Longer
3- Apply the Dip Base & Then the Dip Powder
Apply a coat of the dip base to your entire nails and then dip the nails into your colored dip powder. I usually apply another coat of the dip base followed by another layer of dip powder.
From my experience, 2 layers of dip powder is usually enough but this will vary based on the brand of the dip powder and the shade of color.
Related Articles –
5 Best Brands of Dip Powder Kits- Professional Manicures
Common Dip Powder Questions Answered & Mistakes to Avoid
4- Apply a Clear Powder & Dip Activator
Once your colored powder is on, I usually apply a layer of the clear powder to help protect the manicure, this is optional.
- Apply a coat of the dip base and then dip the nails into your clear dip powder.
- Next, apply a coat of the Dip Activator over the entire manicure to cure the dip powder
Related Article – What is a Dip Base Coat- Best Brands & Substitutes
5- File and shape your Nails & then Apply a Top Coat
- Use a hand file to shape the side of your nails.
- Then use a medium-grit nail file (I use a 180 grit) to gently buff the surface of your nails to make them nice and smooth.
- Next, apply a final coat of the Dip Activator
- And then wipe your nails clean with rubbing alcohol.
- Finally, apply a clear top coat over your manicure.
Related Article – 3 Best Top Coats for Dip Powder Nails Very Durable & Glossy
Other Ways to Fill Dip Nails
If you don’t have any dip powder, there are other ways to do a fill. You can use other nail products such as acrylic, builder gel, or polygel.
How to Fill Dip Nails With Acrylic
You can’t use acrylic powder as you would dip powder since acrylic powder isn’t milled so finely like dip powder. Instead, you would need to make an acrylic bead to fill the growth gap.
- Firstly, Push back your cuticles and then file down and remove the colored dip powder
- Next, wipe your nails with a cotton pad soaked in rubbing alcohol
- Then apply a coat of the dehydrator to the exposed nails near the cuticles.
- Make a small acrylic bead using the liquid monomer and the acrylic powder as you normally would when doing acrylic nails.
- Use the acrylic bead to fill the gap at the back of your nails and then gradually pull the acrylic over your entire nail.
- You don’t need to use much acrylic since the nails are already built out with the previous dip powder.
- Let the acrylic harden and then file to shape
- Buff the nails with a medium grit nail file to smooth them out and reduce bulk.
- Finally, apply nail polish and then your favorite top coat.
Video of How to Do a Fill with Acrylic
Related Article – Dip Powder vs Acrylic Nails: Differences & Which is Better
How to Fill Dip Nails with Gel
You can use any type of gel that is used to make extensions or overlays such as Builder Gels, Polygels or BIAB to fill your dip nails.
How you apply will vary greatly based on the type of gel you use, but these are the basic instructions.
- Firstly push back your cuticles and then file off the colored dip powder.
- Next, clean your nails by wiping them down with cotton pads soaked with rubbing alcohol.
- Apply the dehydrator to the exposed part of the nails near to the cuticles.
- Then take some of the Gel with your brush, start to cover the gap at the back, and slowly spread a thin layer of the gel over the entire nails.
- Cure with a UV-LED nail lamp as per instructions.
- File to shape the nails and then buff the nails down with a medium grit nail file
- Apply your polish and top coat. I recommend using gel polish since it goes better with gel.
Related Articles: